Getting To Know Your Starter Shop V3 CMS
Step 1. Go to your website and add /administrator after your domain name. Example www.yourdomainname.co.uk/
Step 2. Enter your email address and password, provided by Getyouonline.co.uk and then click the log in button.

Categories and Sub-categories
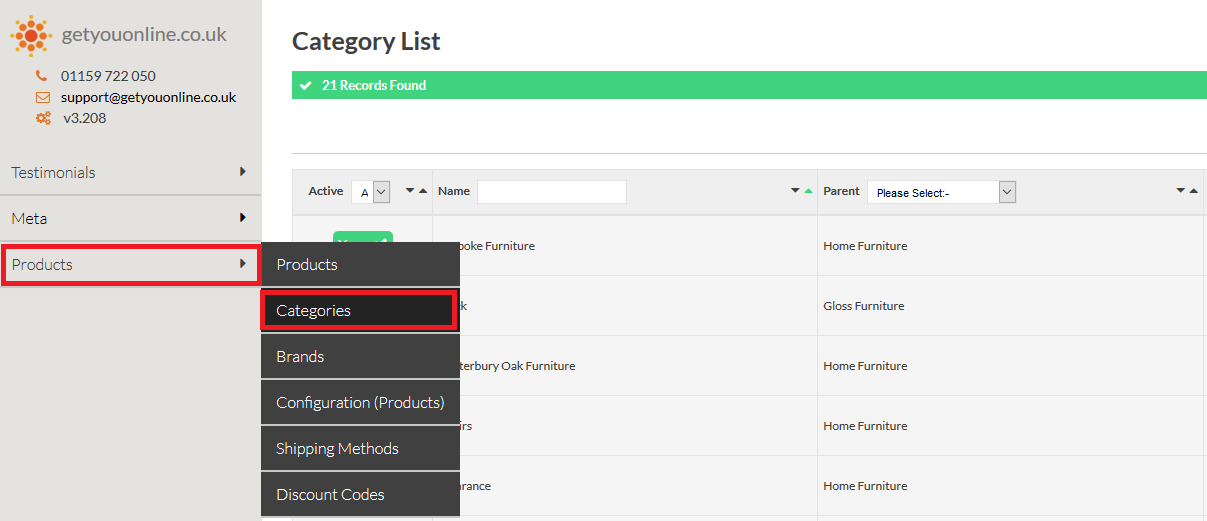
Step 1. Select Products and then select Categories.
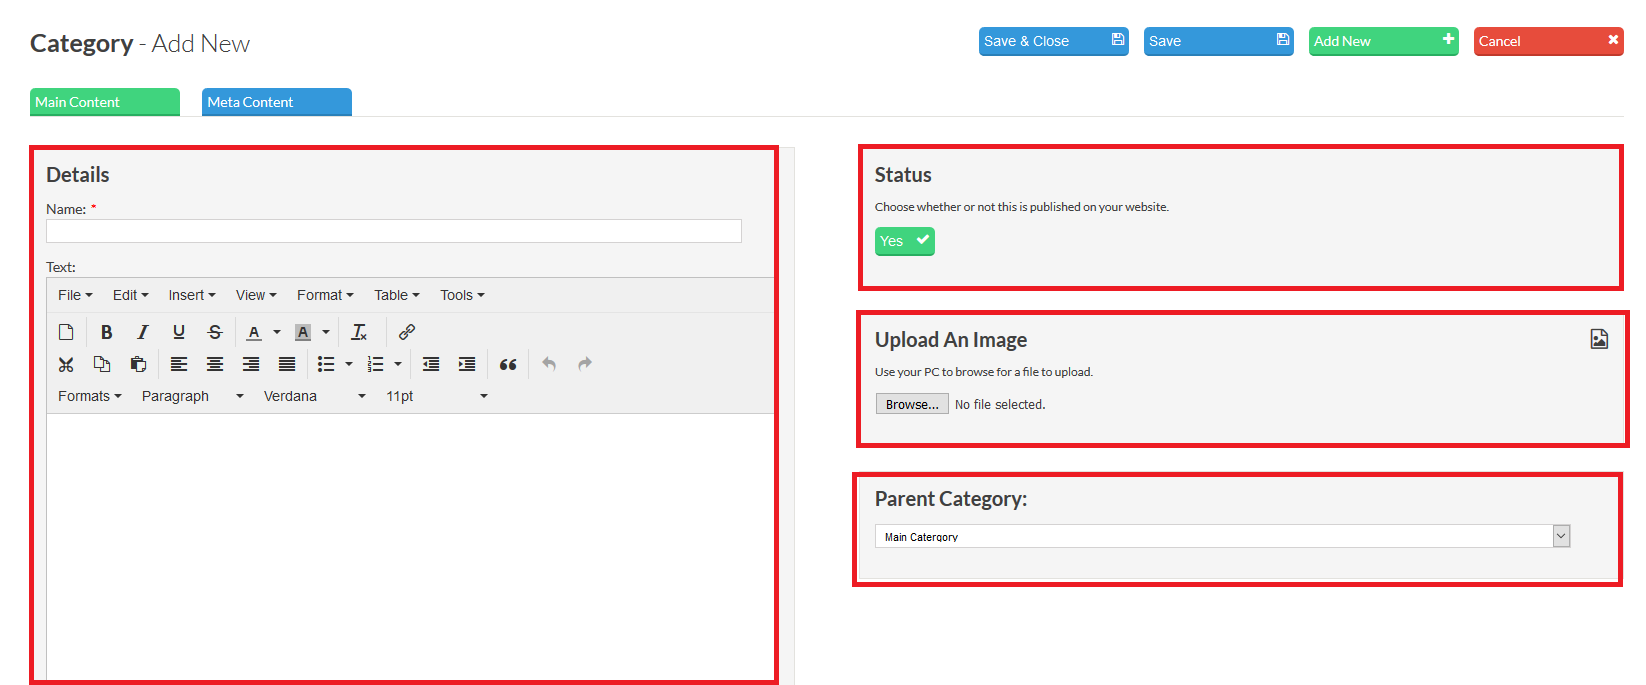
Step 2. To add a new category, select Add New towards the top right. The new page will look like the screen shot below, where you have options to add the name of the new catergory, a description, upload an image and decide it's category status which we will come to next. There is also an option to set the catergory live or not under the status heading.
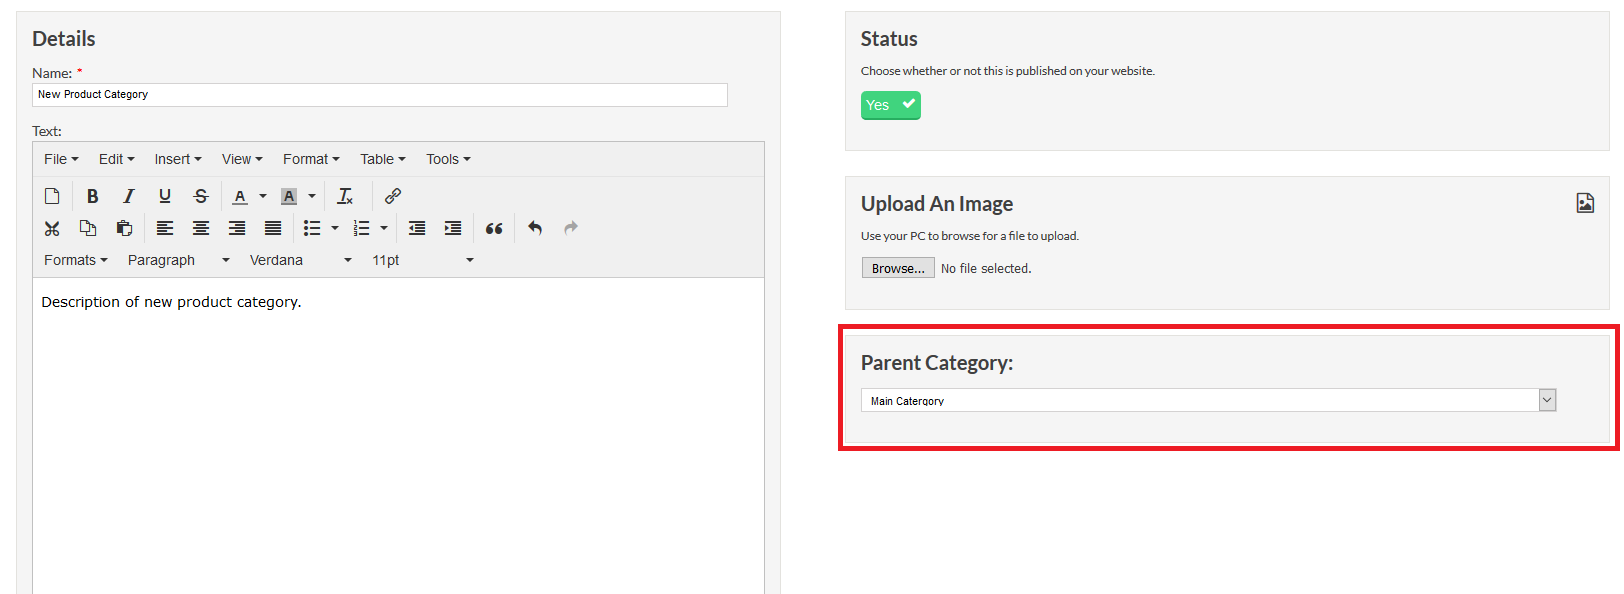
Step 3. It is important at this stage to know or decide what category this will be. If this is going to be a main category as you are just getting started, for example, 'Home Furniture', then select main category. Once you have your main categories set up, you will be have the ability to create new categories that fall under your main categories, for example, 'Chairs', which would fall under the 'Home Furniture' category so you can set 'Home Furniture' as the parent category of 'Chairs'.
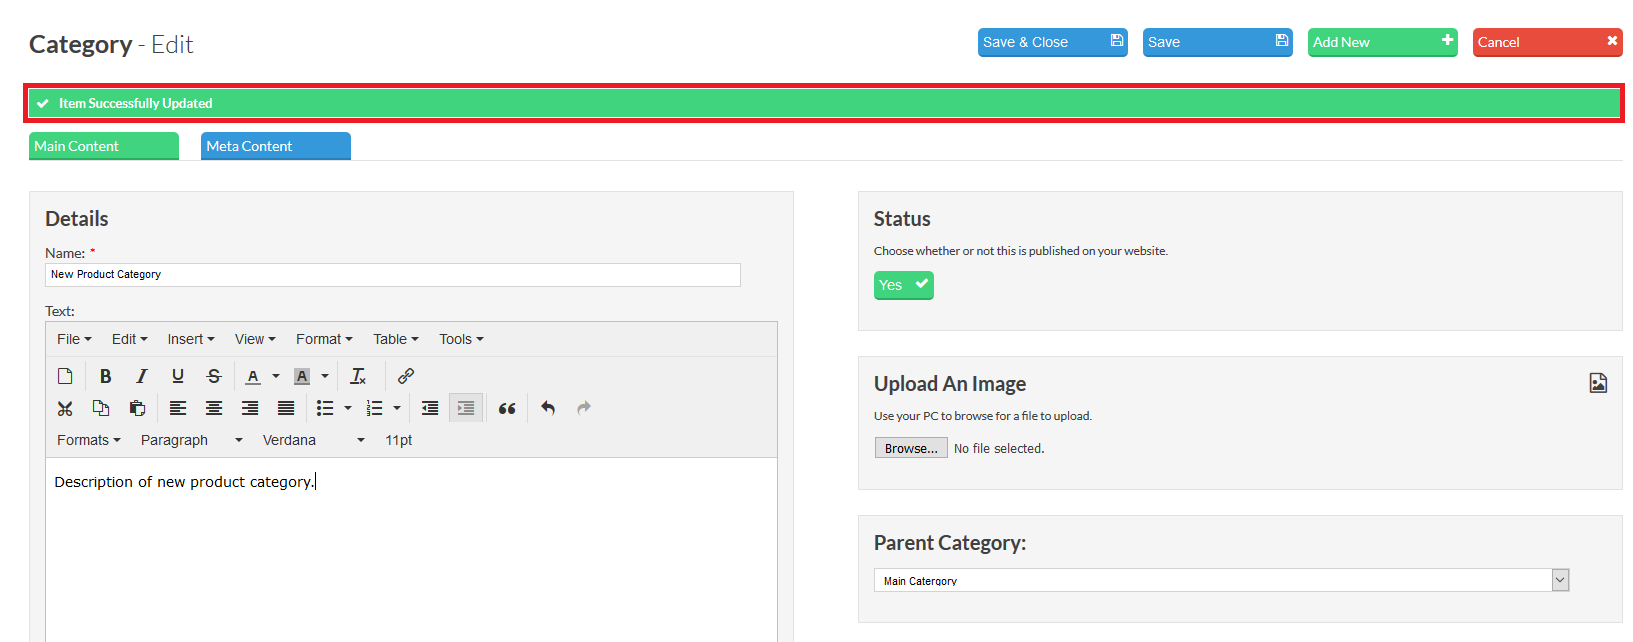
Step 4. Once happy with the details entered, select save and if successful, a green bar with the message Item Successfully Updated will be displayed.
Brands
Step 1. Select Products and then select Brands.

Step 2. To add a new brand, select Add New towards the top right. The following page will allow you add the brand name, a description, an image and set this brand live on your website. As before, select save and check for the message seen previously to confirm it saved successfully.

Step 3. Once you have added some brands, it is important to ensure that each product has been added to it's relevant brand, we will come to this next in the products section. Brands are not essential in order for the website to function.
Products
Step 1. Select Products and then select Products.

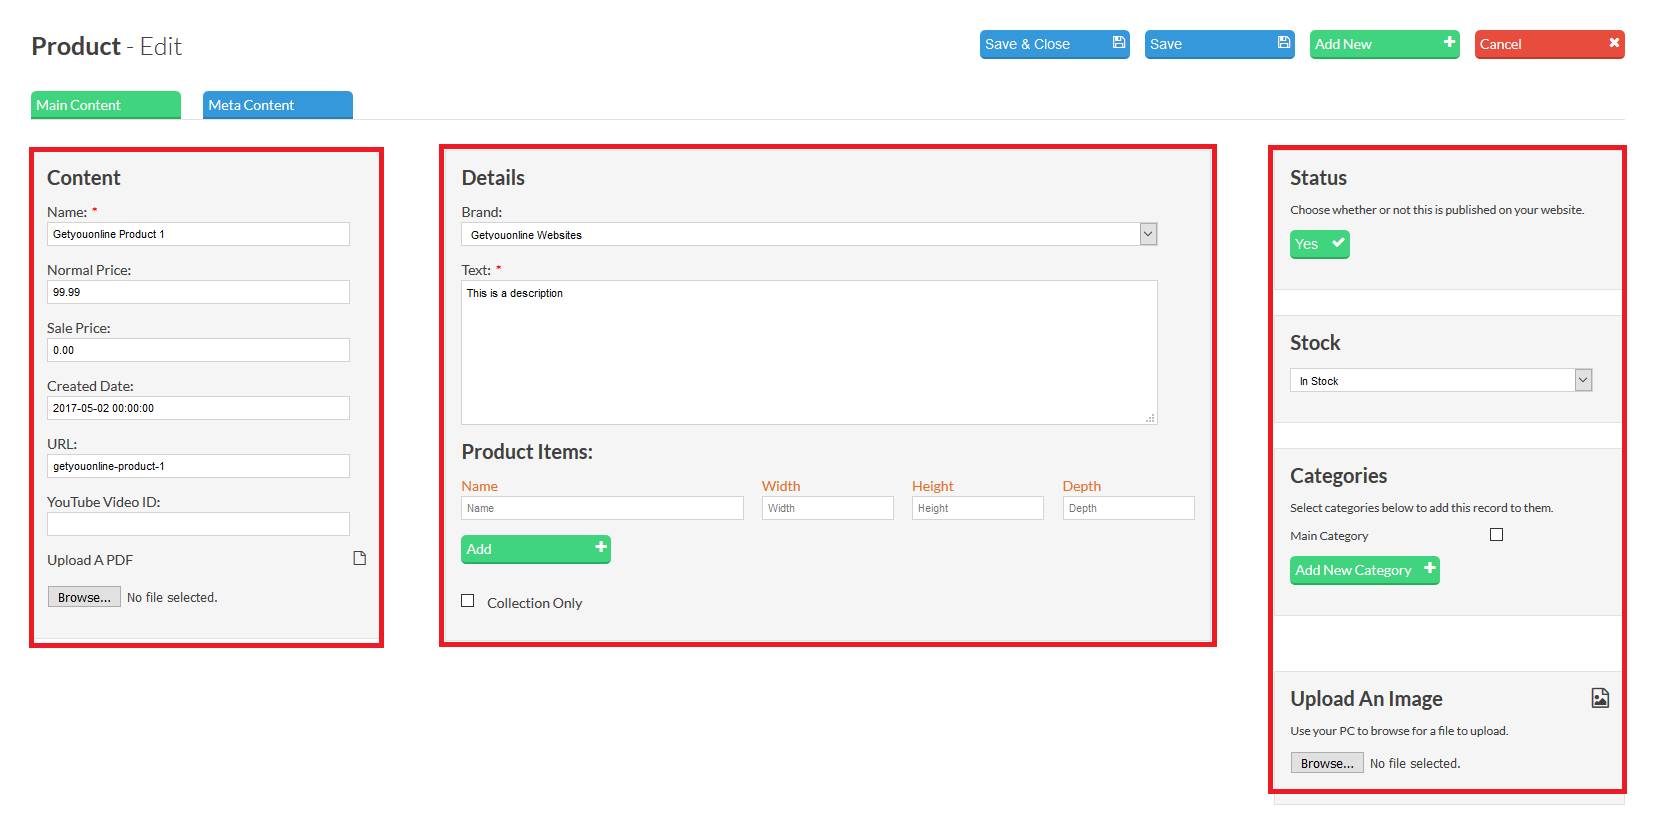
Step 2. To add a new product, select Add New towards the top right. Then see the steps below.
- Enter the Name of the product. (Mandatory)
- Enter the Price of the product. (Mandatory)
- Enter a Sale Price of the product. (Optional)
- Creation Date. (leave blank as the system will fill this automatically).
- URL. (leave blank as the system will fill this automatically).
- Enter the YouTube ID to add a video to the product. (Optional)

- Upload a PDF of the product if you wish. (Optional)
- Choose a Brand this product belongs to if applicable.
- Enter a Description of the product. (Mandatory)
- Product Items, enter the name and dimensions in cm of each item. You can add multiple product items by clicking the ADD button.
- Select whether the item is In Stock or not. (Optional)
- Select which Category this product belongs to. You can select multiple categories.
- Upload an Image of this product. You can upload multiple images for a product, but you must do them one at a time (clicking save after uploading each one).
Shipping Methods
Step 1. Select Products then Shipping Methods.

Step 2. Select Add New towards the top right of the page.You will then be presented with the options in the screen shot below and again the ability to set this live. In the screenshot, we have set a standard delivery charge of £6.95 unless the total amount of items ordered exceeds £100, in which case delivery will be free. Built in to the code is a message in the checkout area to inform customers if they spend more they qualify for free delivery so worth adding this as it could increase sales! Also, as before, once we click save, the message New Item Added Successfully will appear to confirm.

Discount Codes
Step 1. Select Products then Discount Codes.

Step 2. Select Add New towards the top right of the page. You will then be presented with the options in the screen shot below and again the ability to set this live. In the screenshot below, we have added a summer discount code called SUMMER20, set the value as 20 percent off (we do also have the option to set this to an amount if we wanted to offer £20 off) and set the start date from May 1st 2017 and the end date as June 1st 2017.

Meta Data
Step 1. Select Meta.
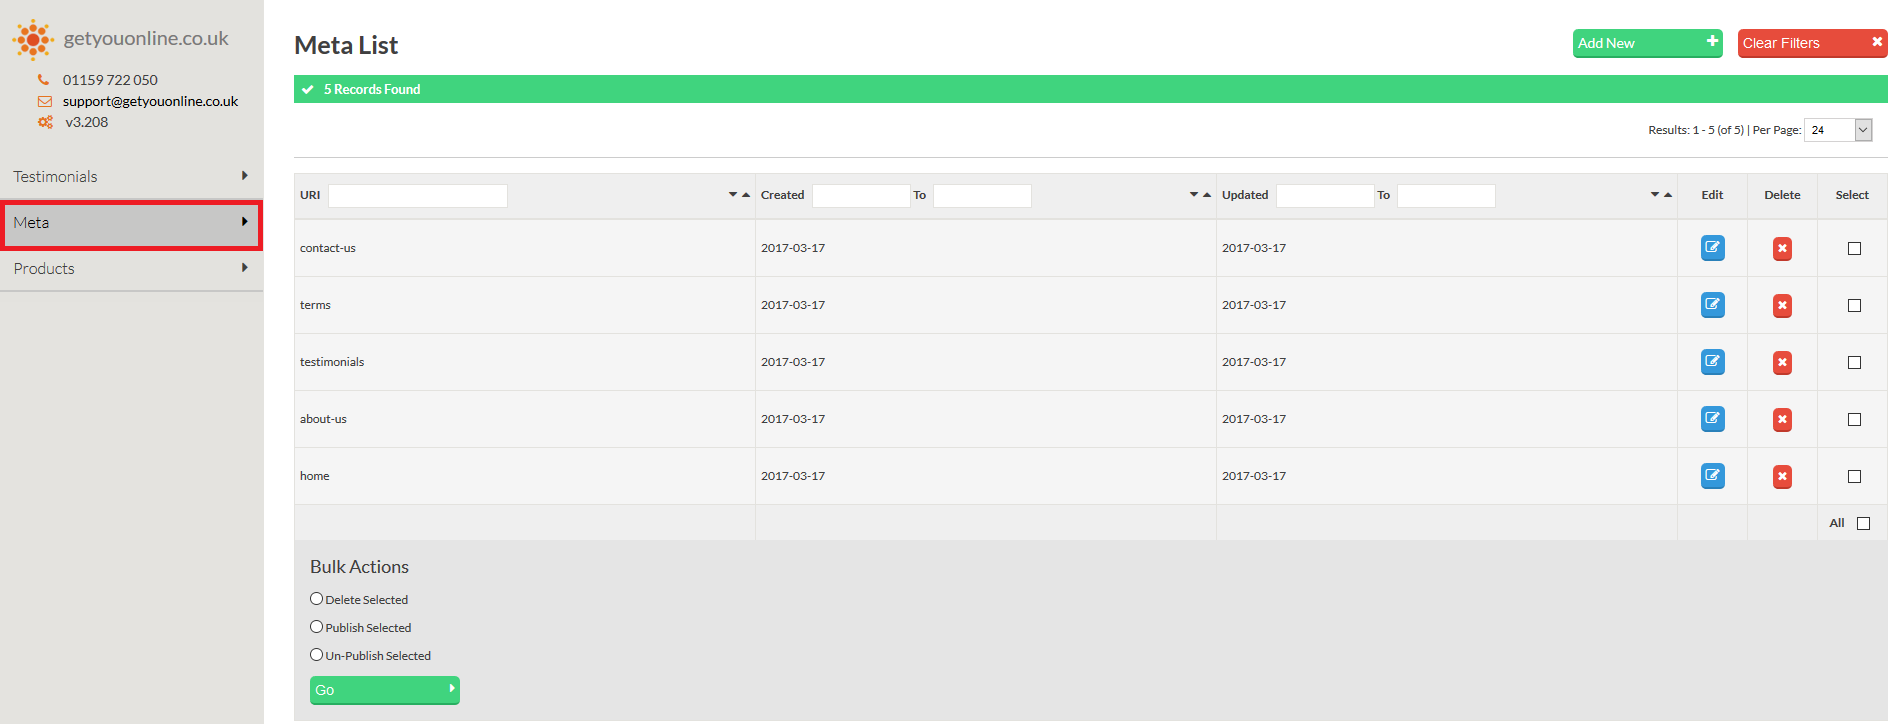
Step 2. Select the page to edit.
Step 3. Add the meta detail you require, use the screenshot below as a reference to how to fill this section out. If you are unsure get in touch with your account manager.


